What are contours?
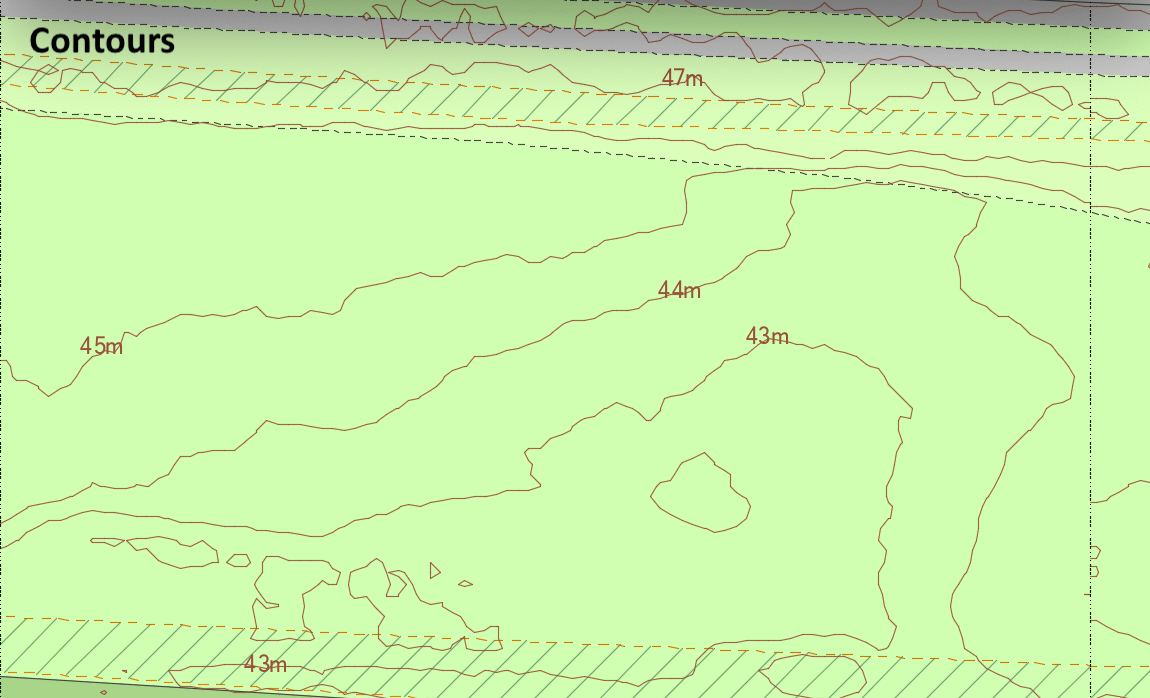
Contours are lines drawn on a map that are connected to the same height. Contour interval refers to the height difference, for example, they are drawn every metre. On a map, contour lines show the elevation of various locations. They also assist us in determining the steepness of slopes as well as the direction in which the ground slopes. The contours create patterns that indicate how steep the slopes are: the closer the contour lines are together, the steeper the slope. As a consequence, we can differentiate the land's relief; whether it's a valley, a mountain, a valley with a flat floor, a valley with or without a stream, a round cone-shaped hill, and a hilltop. In architecture selecting the best site for every project includes thoroughly evaluating its contour map, enabling the site's attributes to drive design concepts, and maximising its potential through extensive site analysis.
You can easily get your contour maps through our website within minutes
You can read our detailed Contour guide here and find out all you need to know about contours.
Step 1
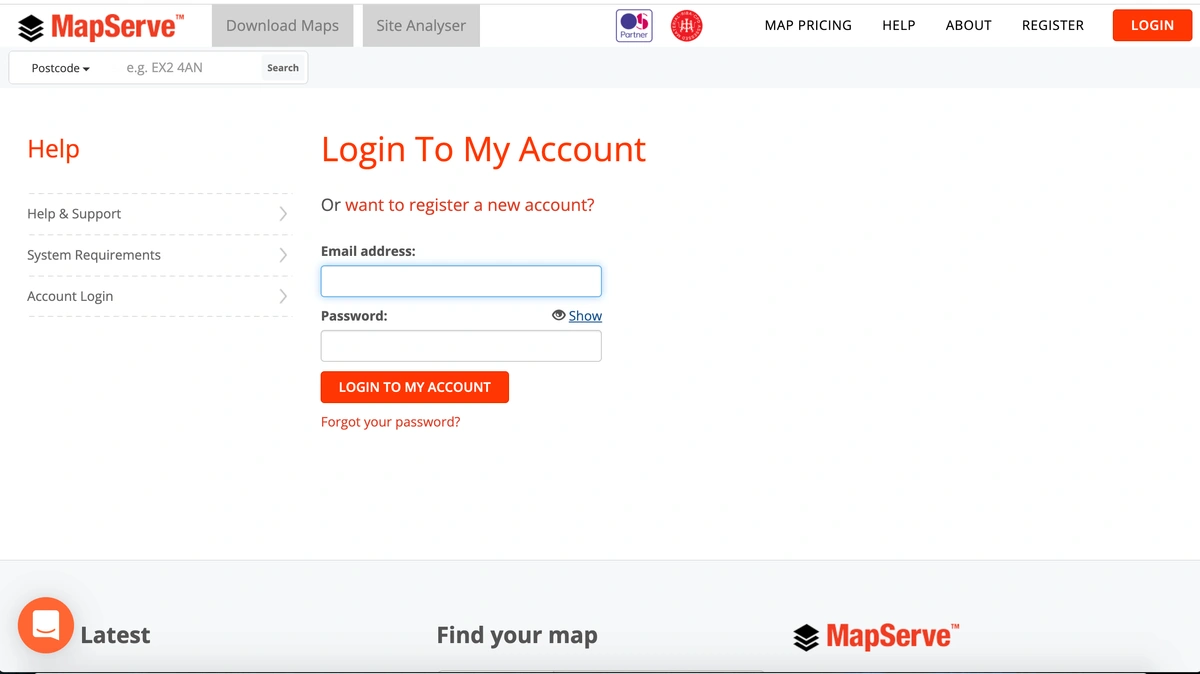
The first step is that you need to register for an account using your:
- Name
- Email address
- Password of your choice
If you already have an account you can login using your personal details as shown below.
Step 2
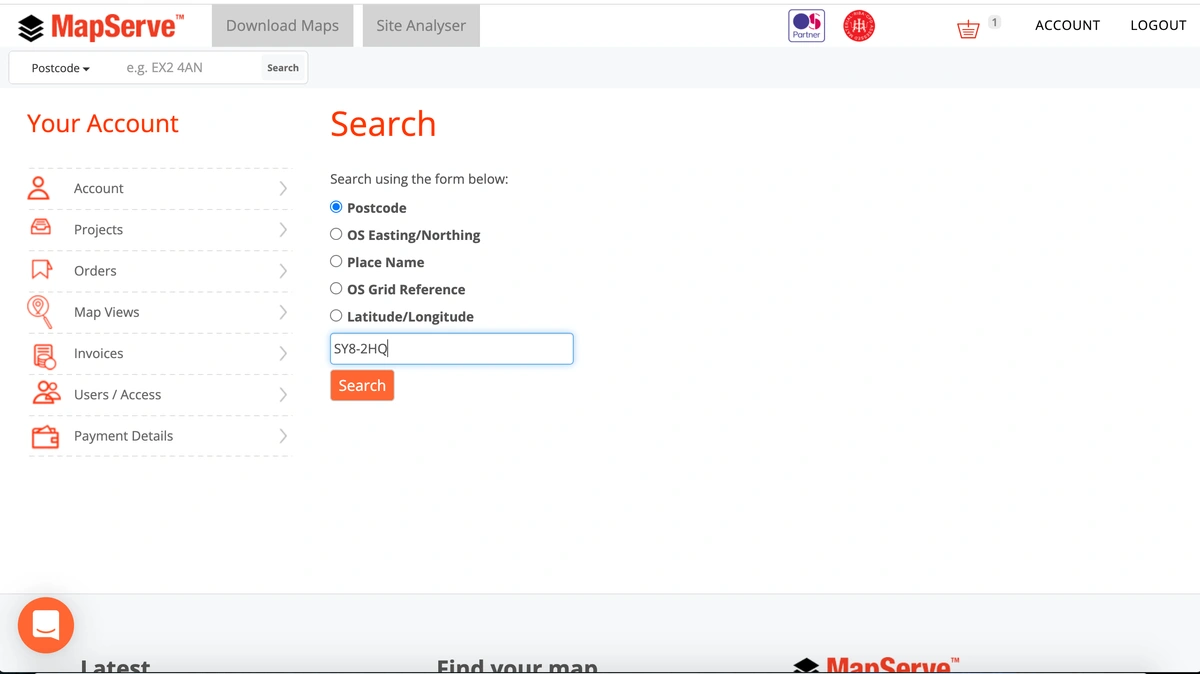
The next step is to search for the location that you want. We have 5 search methods available:
- Postcode
- OS Easting/Northing
- Place Name
- OS Grid Reference
- Latitude/Longitude
If you do not have the postcode for the area you want to look for you can use one of the other options. You can use this Grid Reference Finder to find out the rest of the details.
Step 3
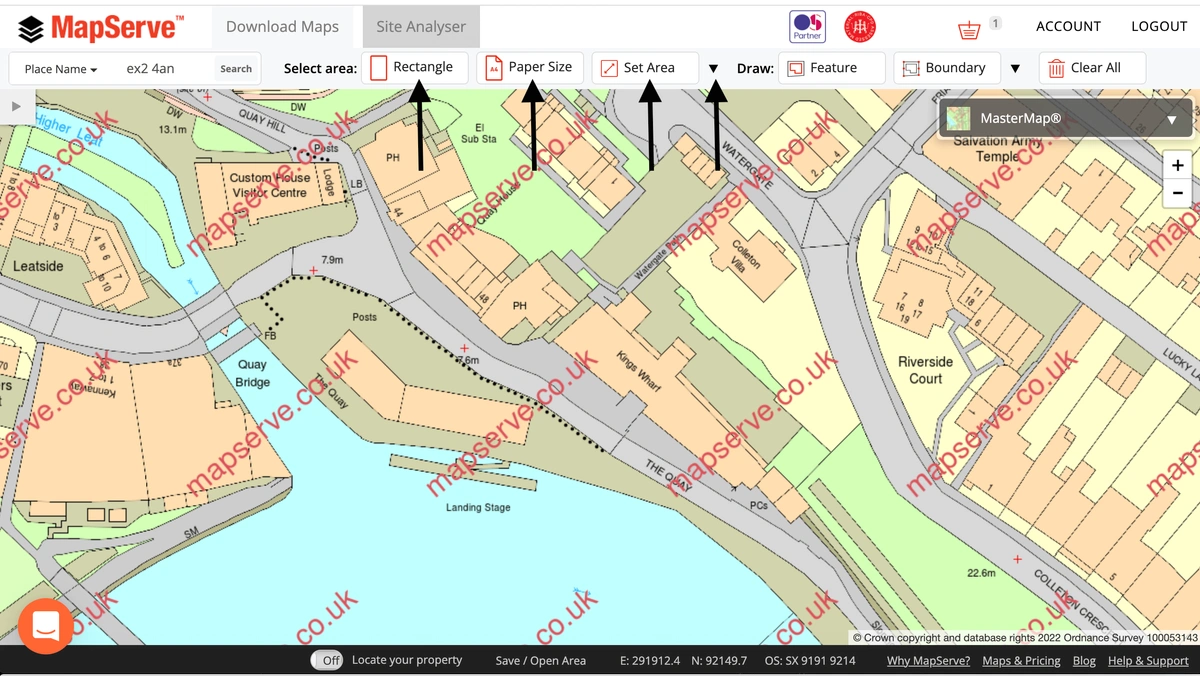
The address you selected will be centered on the map. The map that you see is an OS MasterMap® preview and you will get the same detailed map when you purchase your plan. The next step is to select the area that you want to purchase. We have various tools to help you select your area as shown below.
Step 4
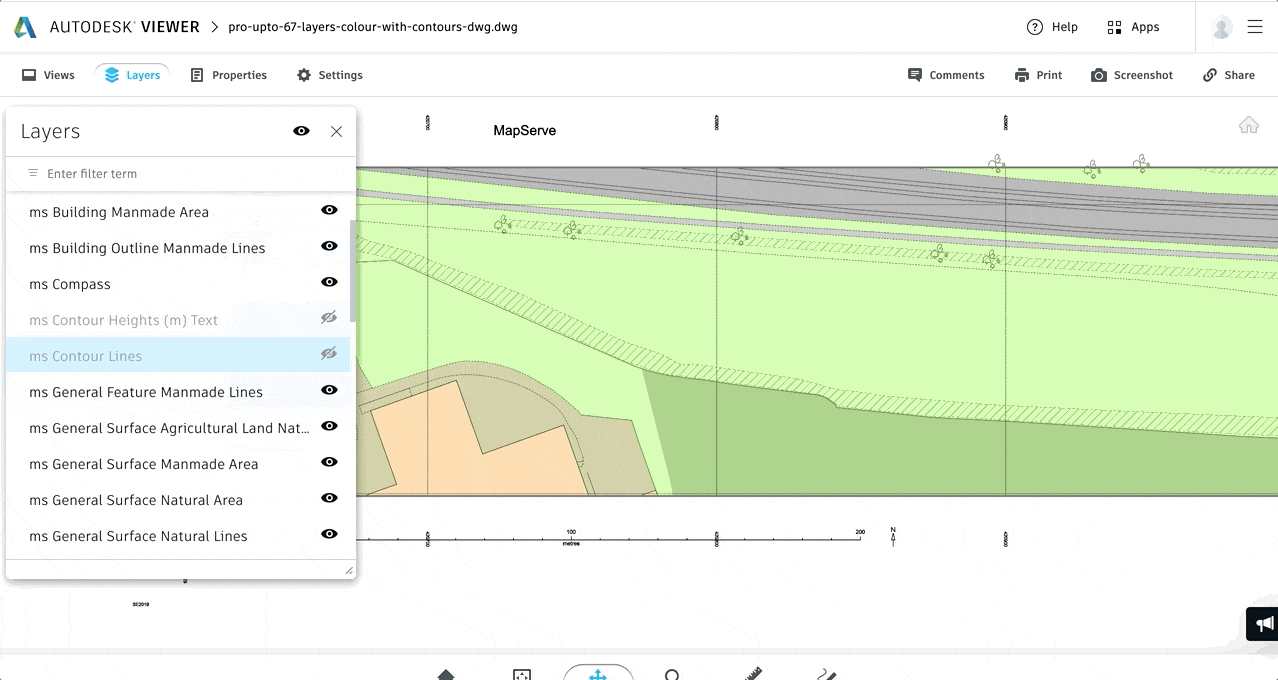
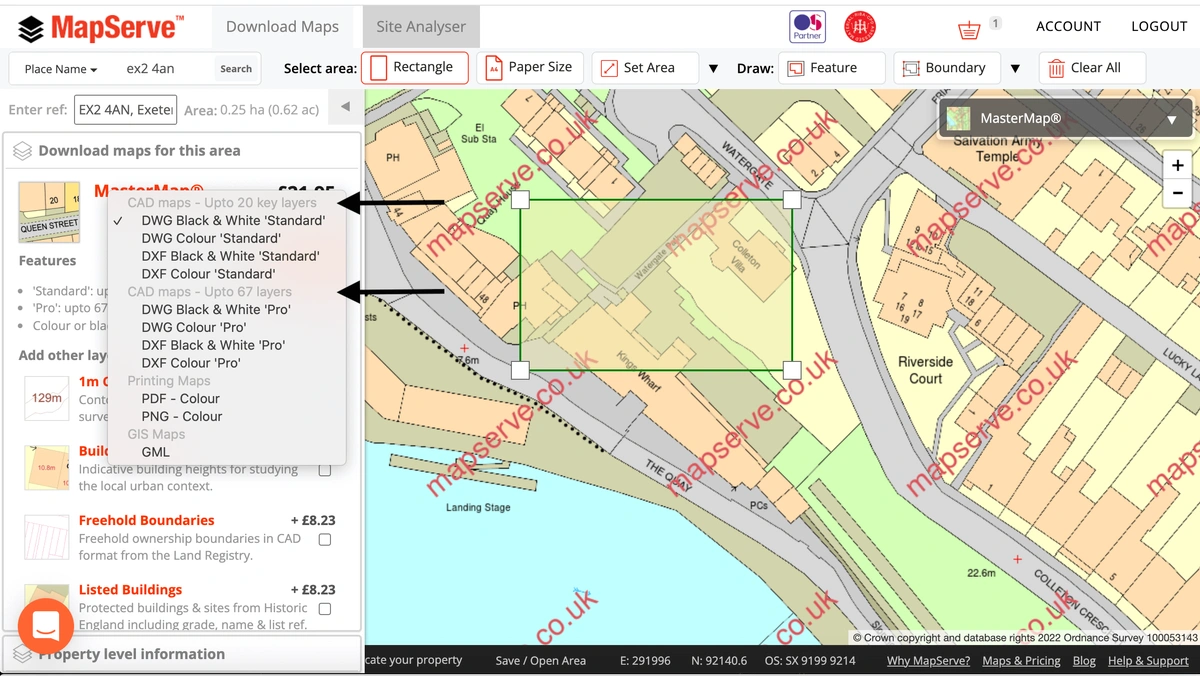
Then, a drop down menu will appear on your left stating the quote as well as all the types of map that we have. OS MasterMap® is the first option on the list and the 1m contours come as an additional layer to OS MasterMap®. Make sure you select one of the CAD formats available when you need 1m contours such as DWG or DXF formats in standard, or professional format. The same amount of detail appears on both formats, the only difference is the amount of layers the data is spread in.
Step 5
The final step is to add the map and contours to your basket. You can then proceed and purchase your contour map.

Step 6
Your map including contours is ready to be used on your CAD software. The video below shows the contour layers that are added to your map.