This is a practical guide on accessing OS MasterMap® through MapServe®. We'll walk you through the straightforward steps to make it easy. Start by creating a MapServe® account with your name, email, and a chosen password. Once registered, you can efficiently explore the latest update of OS MasterMap®, the most updated and detailed map of the UK. Let's dive into the simple steps to unlock valuable geographic information and enhance your mapping experience.
Download the latest update of OS MasterMap® here
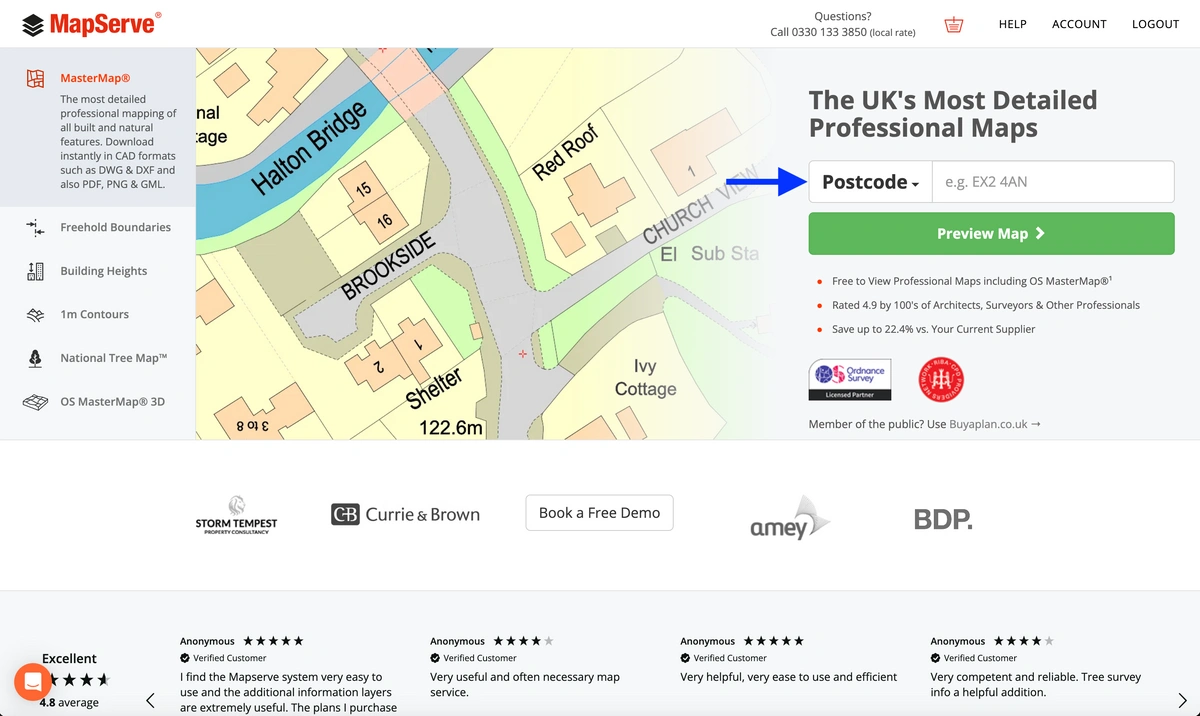
1. First you need to search for your property using the search box. If you do not know the postcode for your property you can use any of the other options available such as grid reference number, eastings/northings, latitude/longitude or a place name.
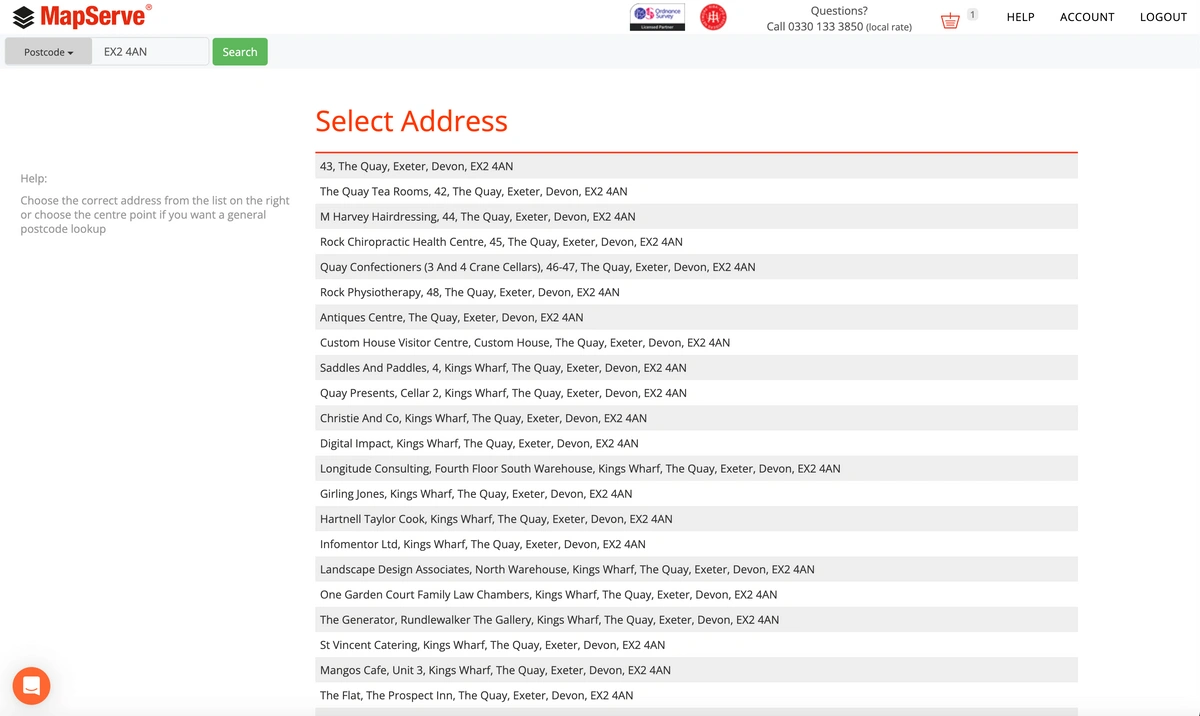
2. A menu with a number of available addresses will appear. You need to choose your address from the list as shown below or select the postcode as your centre point for the map.
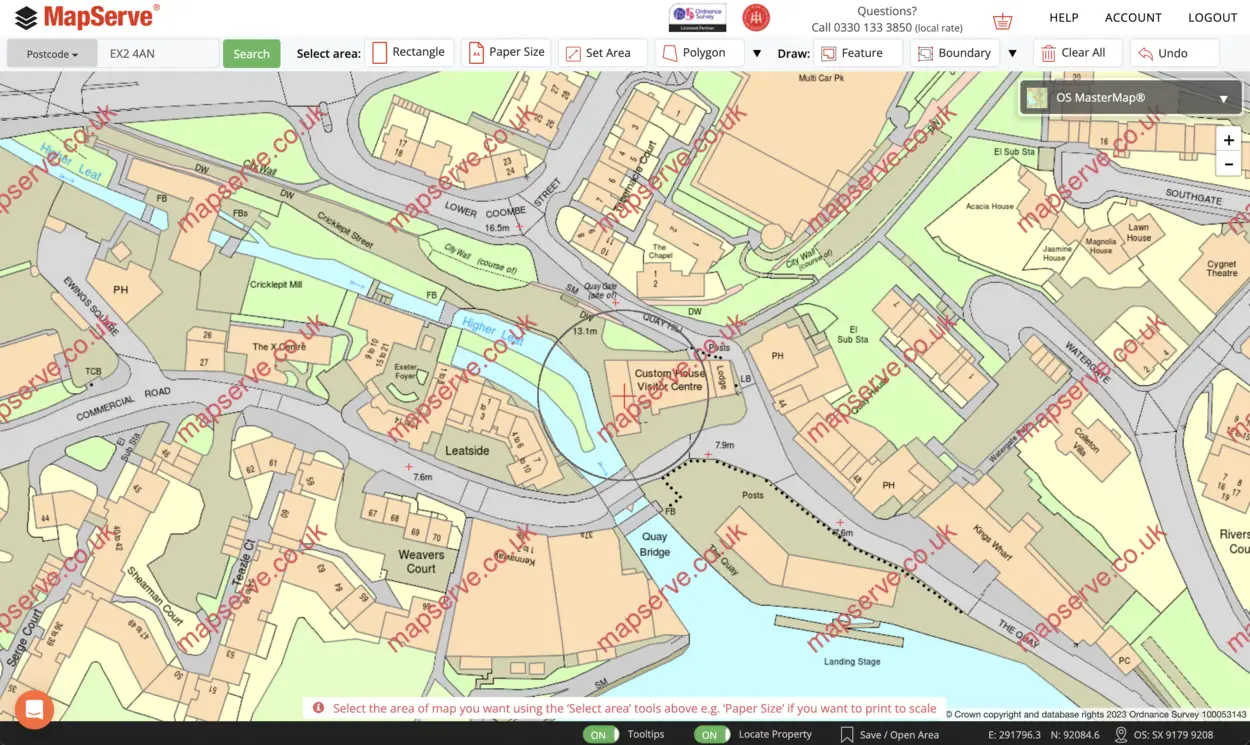
3. The map will automatically centre on the address you have selected from the list.
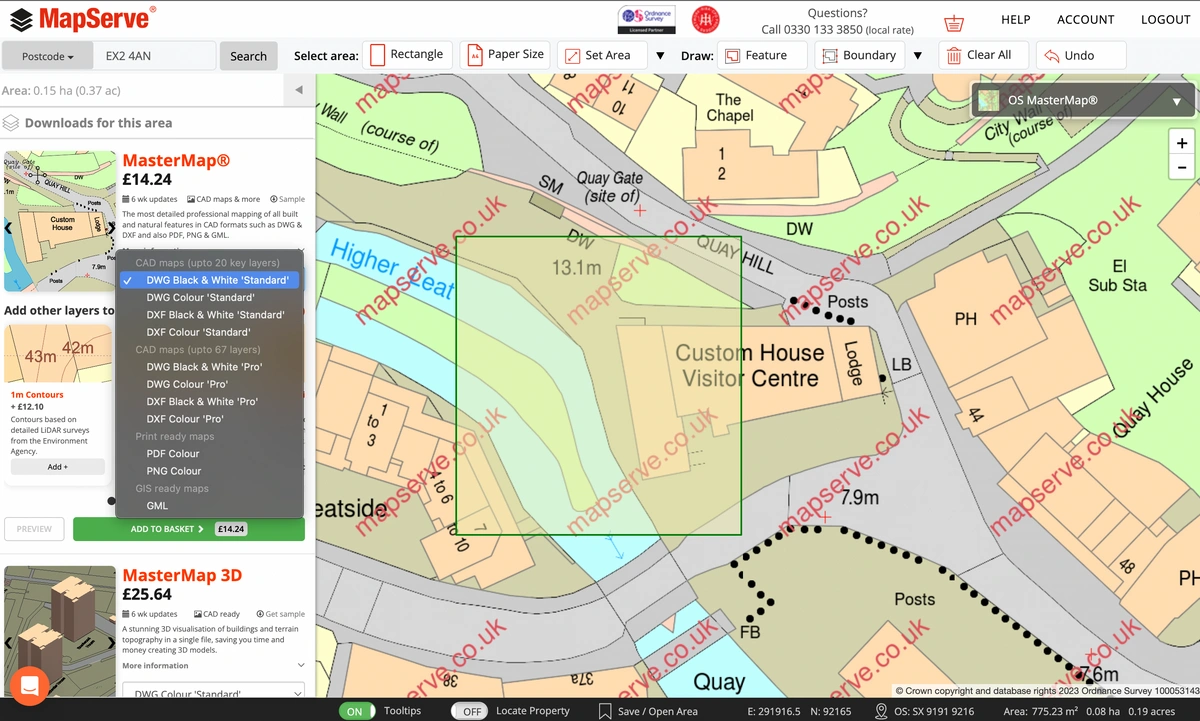
4. OS MasterMap® is available in different formats including CAD (DWG and DXF), PDF, PNG and GML.
a) PDF/ PNG MasterMap®
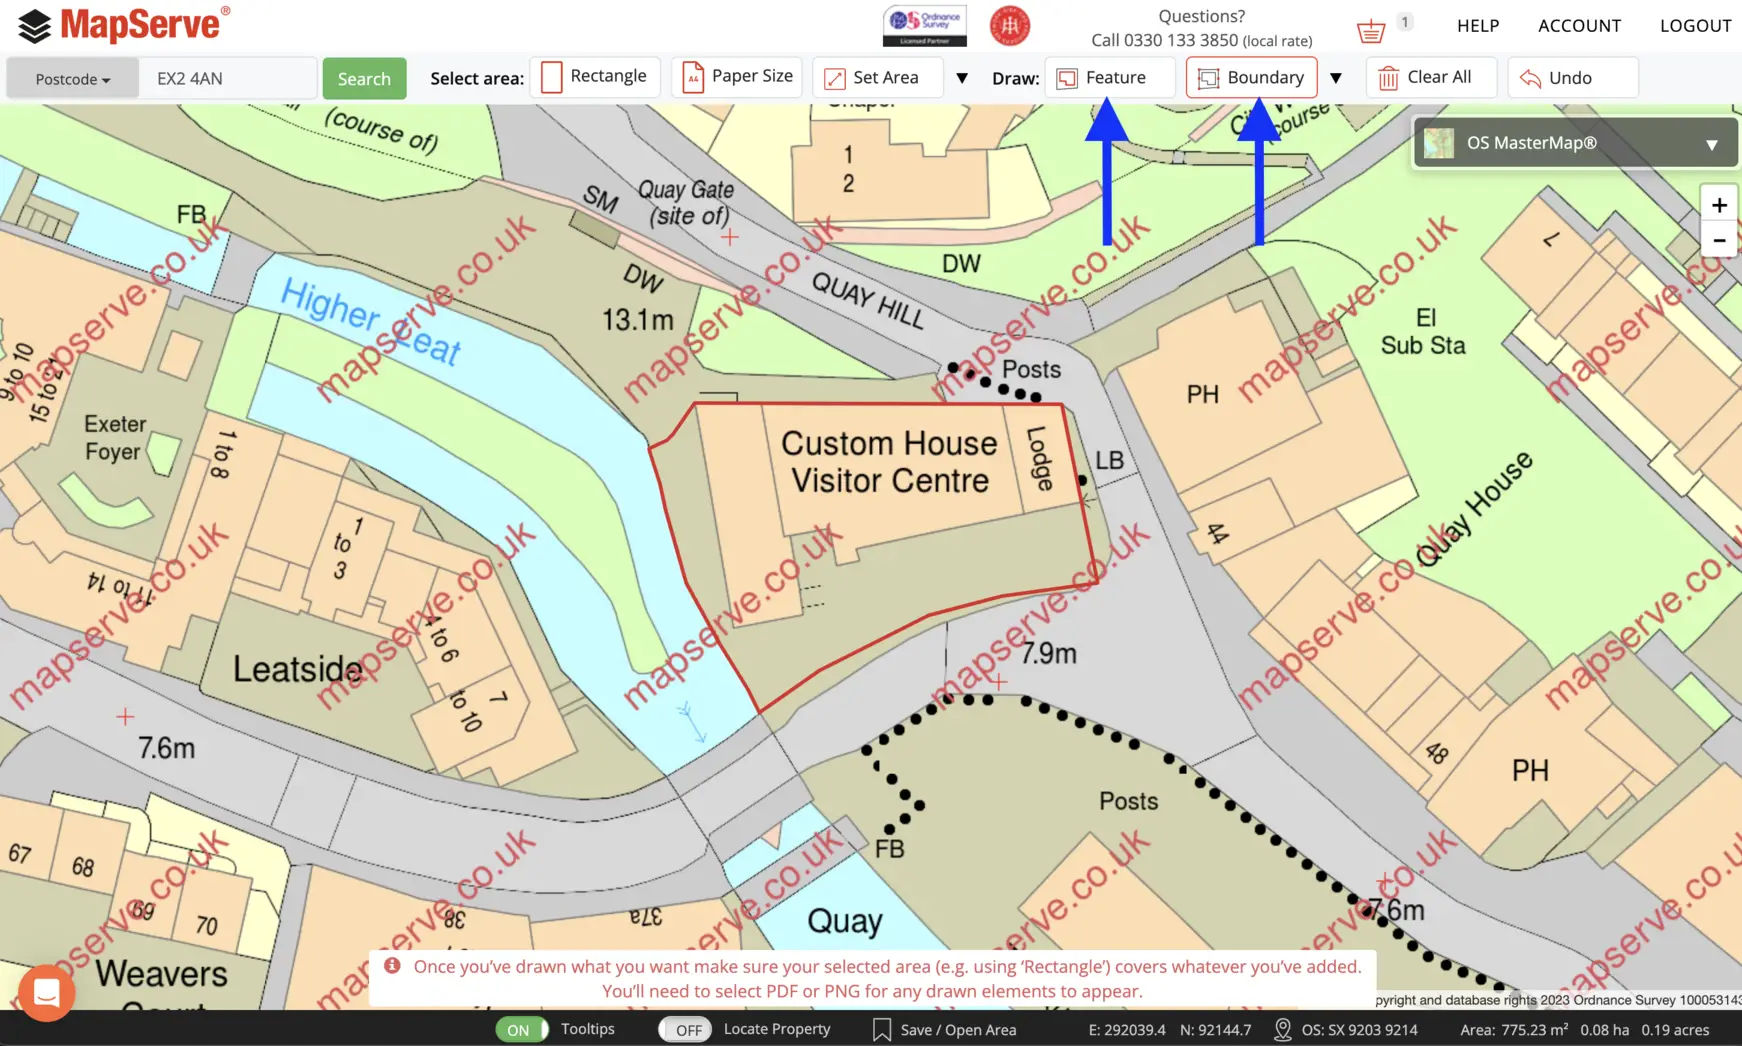
If you need your MasterMap® in PDF or PNG formats, usually for a planning application you might need to outline your property's boundaries in red. We have a number of different tools available to do that as shown below. The outlined areas, both in red and blue will only appear on PDF and PNG maps and not on CAD plans.
- Feature
- Boundary
- Draw Line
- Outline
- Snap to point
Feature and boundary tools can help to automatically outline either a part or your whole property.
When you have outlined your desired areas you will need to select the scale, orientation and paper size of your map that will be added to your plan. You can do that using the 'Papersize' tool.
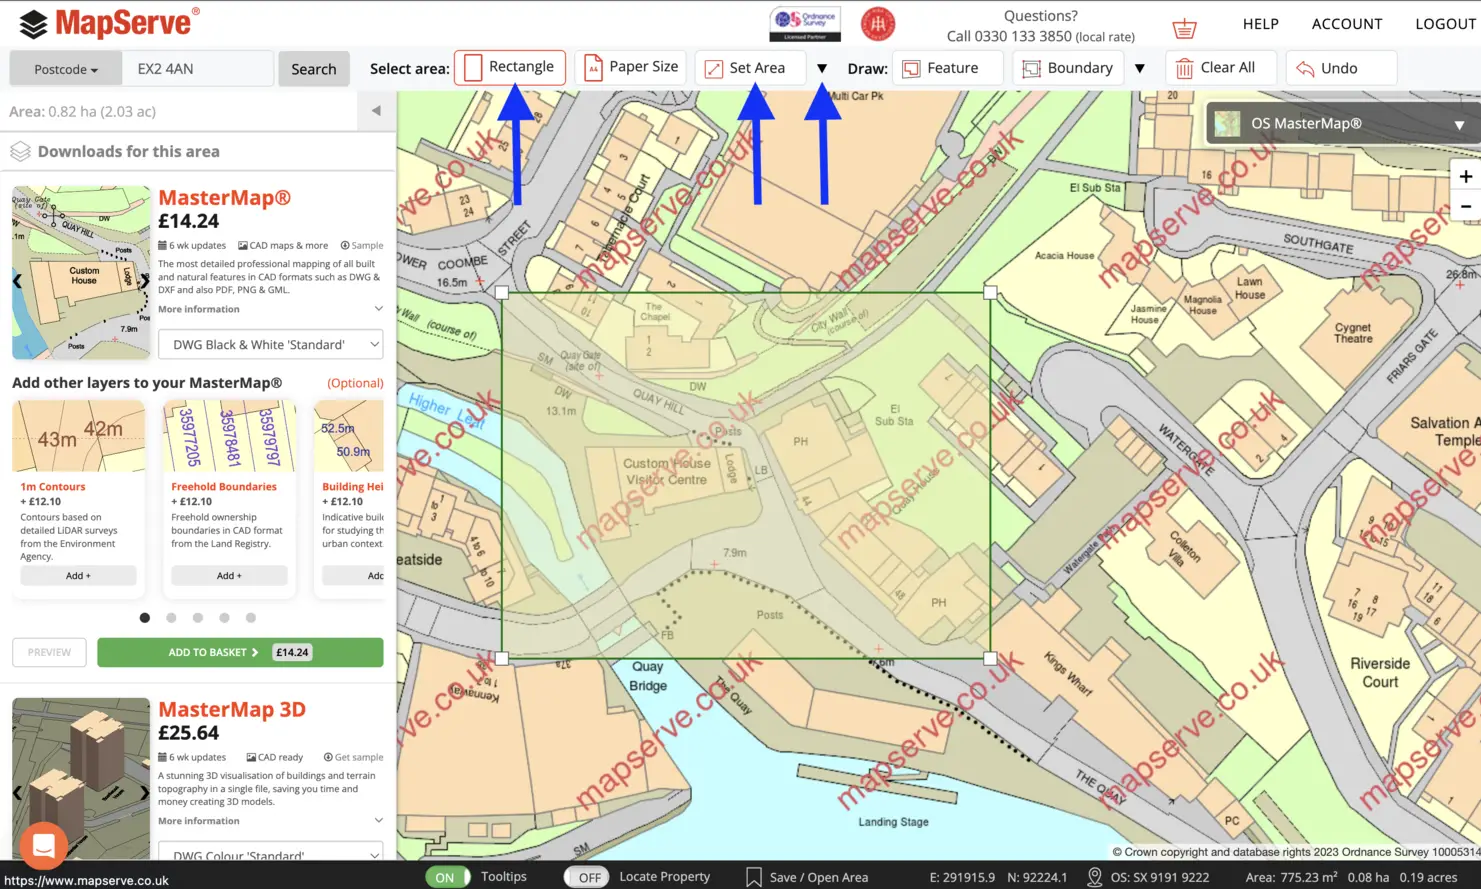
b) DWG/DXF MasterMap®
If you need a map in CAD format you simply need to outline the area of the map using one of our selection tools such as the:
- rectangle
- set area
- polygon
5. Next, you must select the desired map format, such as DWG. Opting for the 'standard' choice in CAD formats (DWG or DXF) provides a map with 20 layers, while the 'professional' option gives access to a map with up to 67 layers, allowing comprehensive control over the map's data. PDF and PNG formats are usually selected for planning applications.
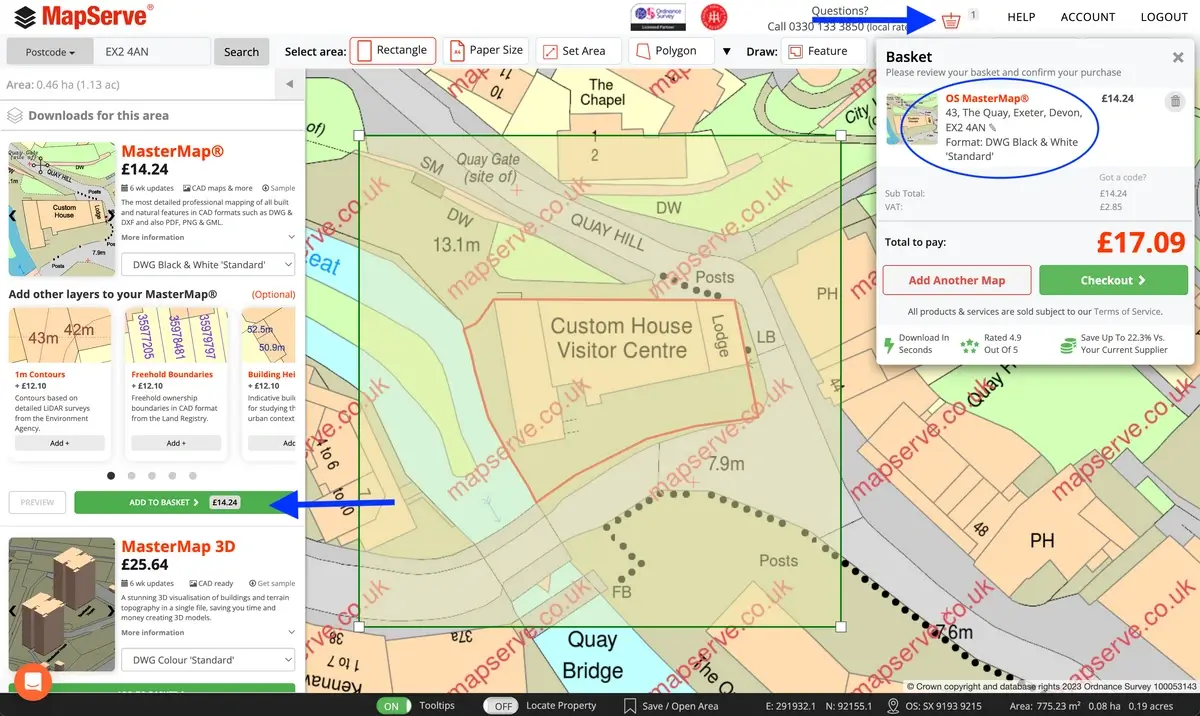
6. You also have the choice to incorporate extra layers into your map when choosing CAD format (DWG/DXF formats). These layers receive regular updates from reliable sources like the Ordnance Survey and include:
e) UPRNs
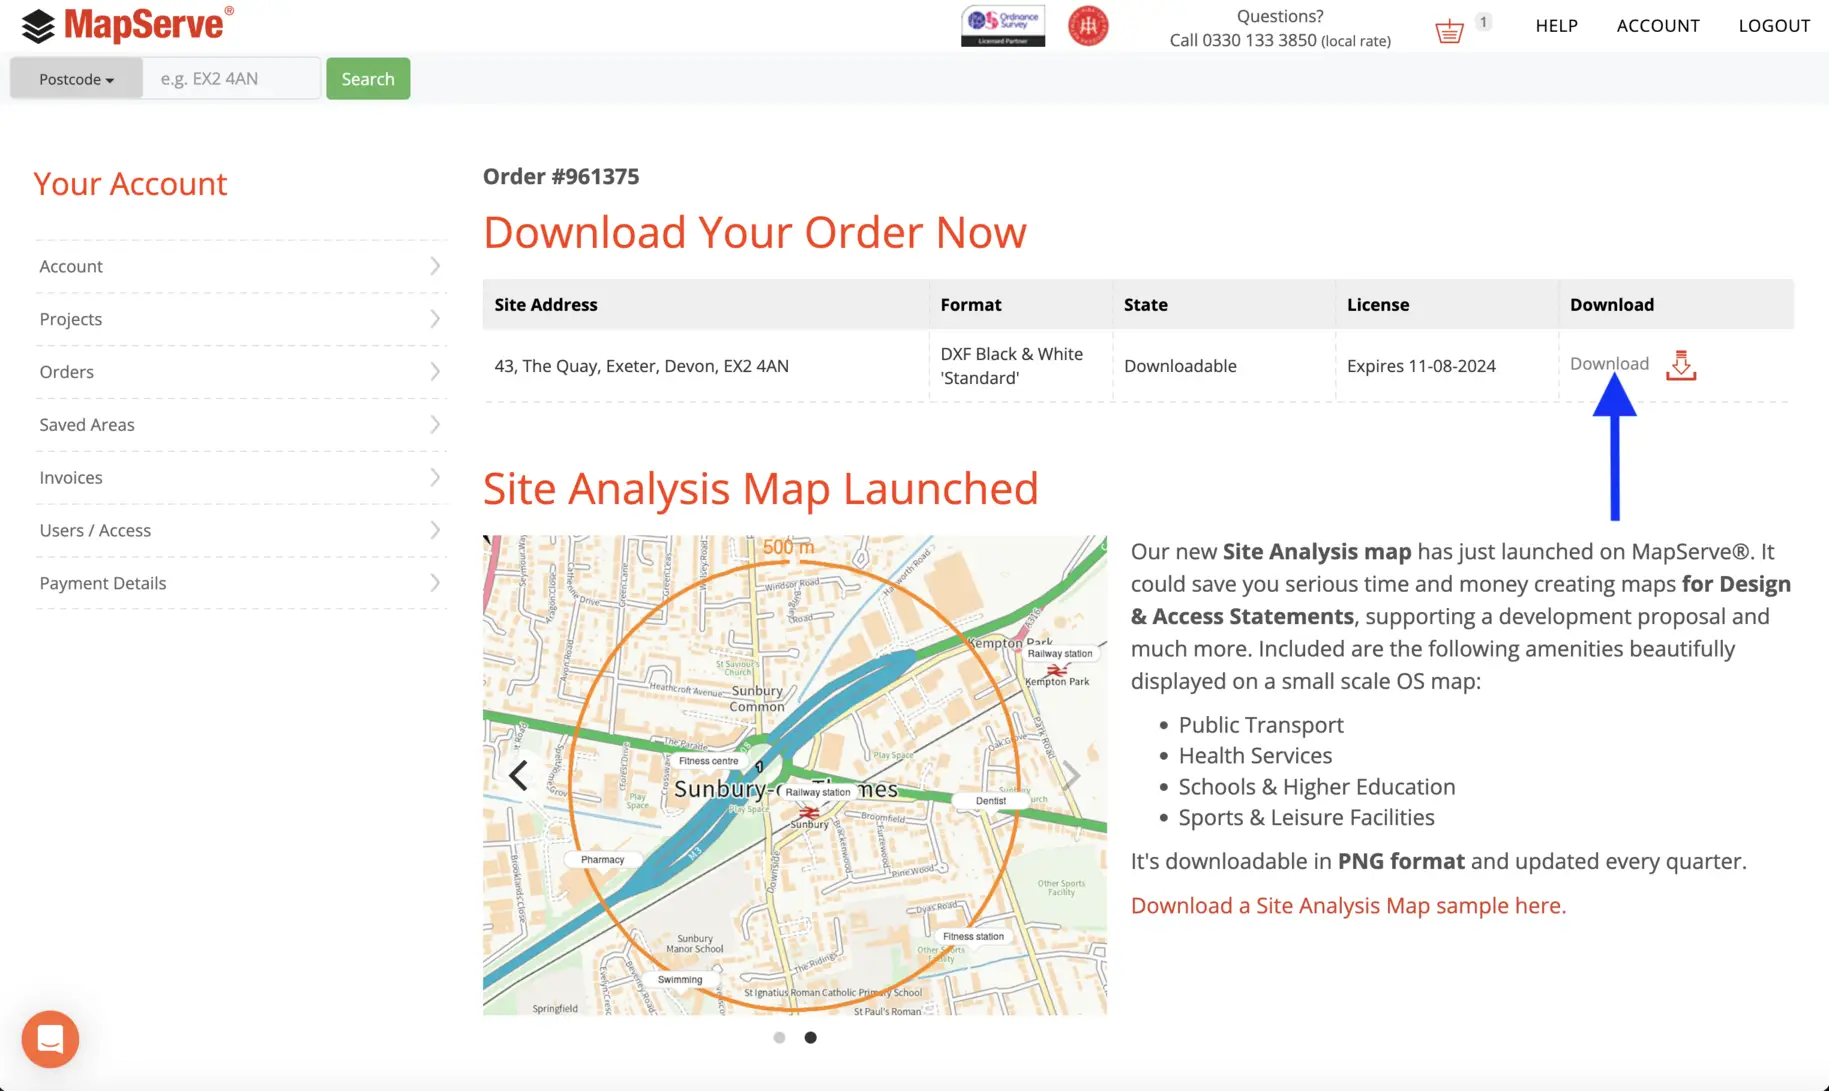
7. Once your map is finished, select the 'Add to Basket' button. Make sure that the correct format and map are chosen in your basket before proceeding to checkout.
8. You will be directed to a new page where you can download your map withing seconds. To access all your orders, navigate to your account at the top right of the page and click on 'orders.'