A step-by-step guide on how to create your location plan on MapServe®.
Create your location plan within minutes here
Step 1
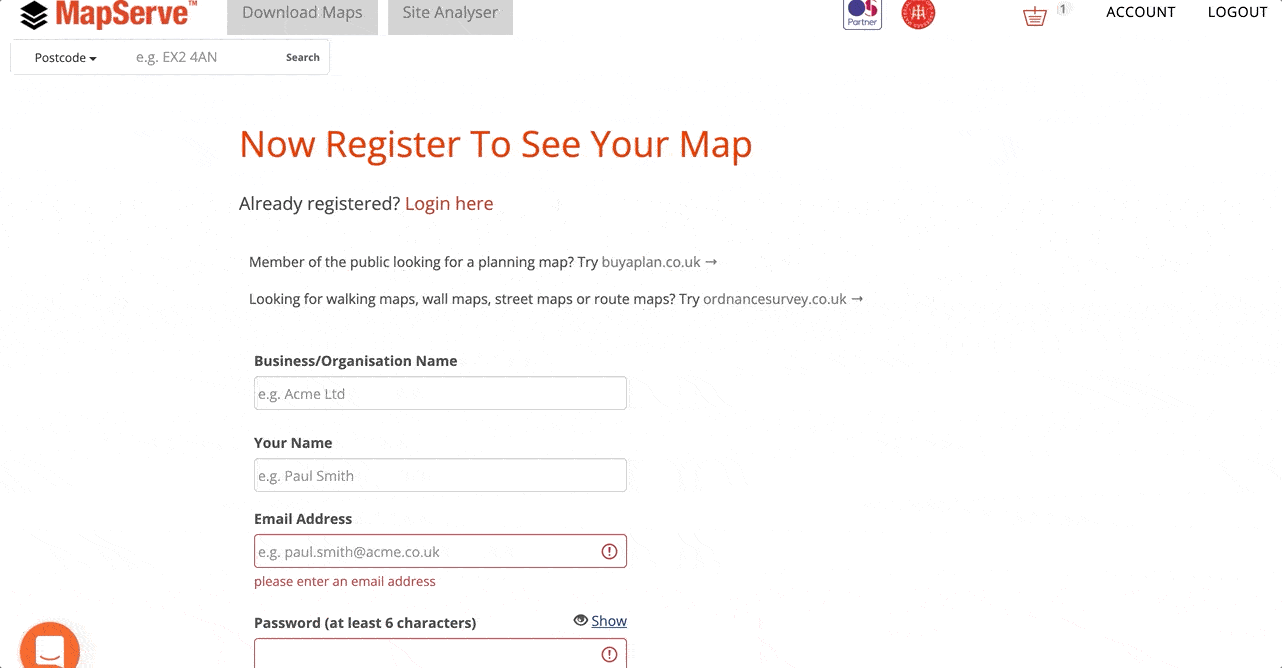
The first step is to register or login to your account using your email and a password.
Step 2
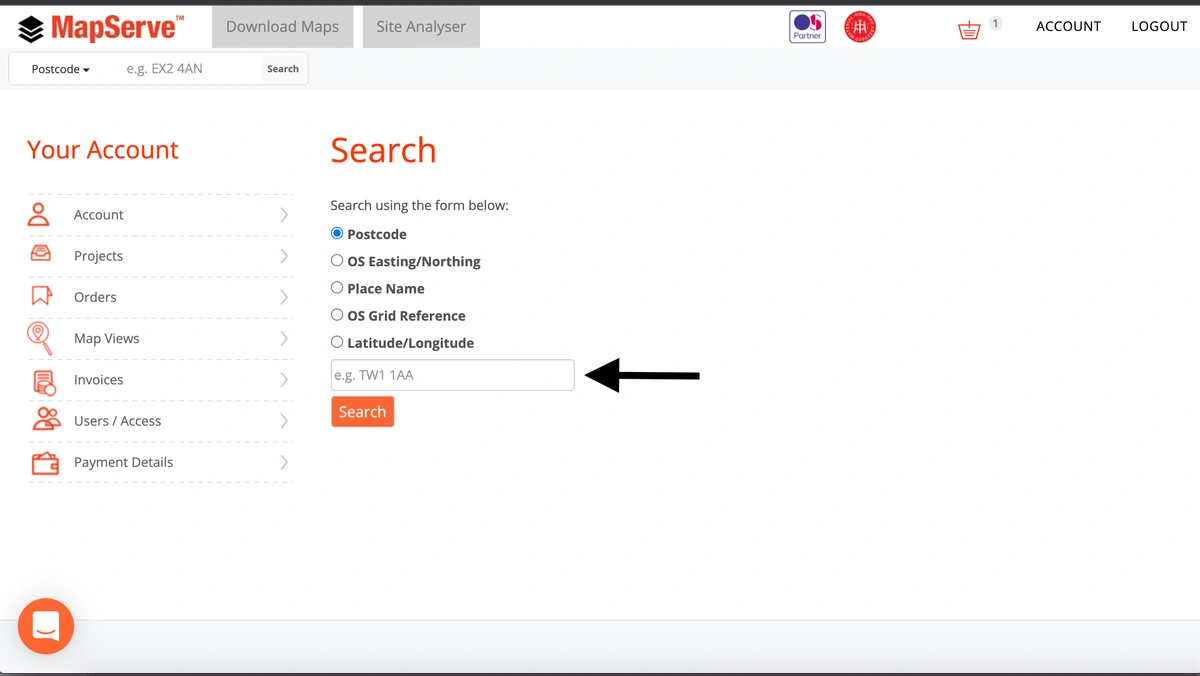
Then you are ready to search for the location that you want using one of our 5 search methods: Postcode, Easting/Northing, Placename, Grid reference number, or Latitude/Longitude. Simply click on the search method you prefer and put in your details before clicking on the orange 'search' button.
Step 3
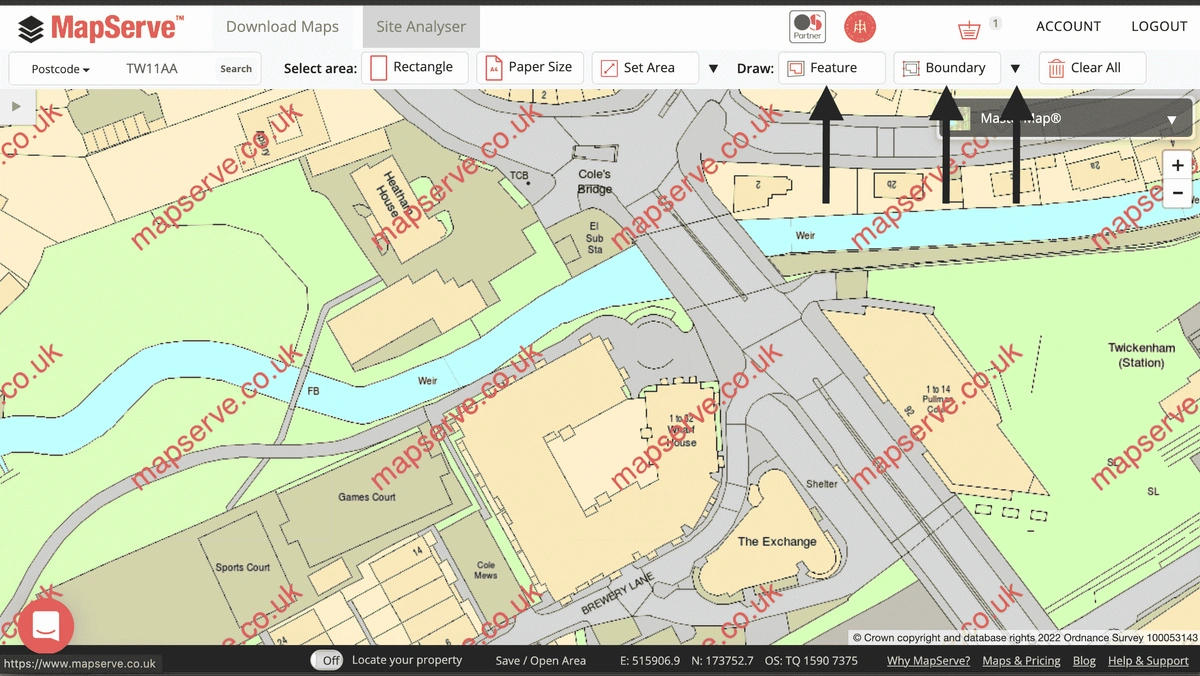
You will be directed to your map. Your location will be at the center of the map where you can outline the area that you want using one of our available tools. You can outline using the 'feature' or 'boundary' tool. If you want to outline a different area of your choice or you want to use the blue colour click on the down arrow from the toolbar. This will reveal all of our tools such as the 'measure' or 'outline' tools.
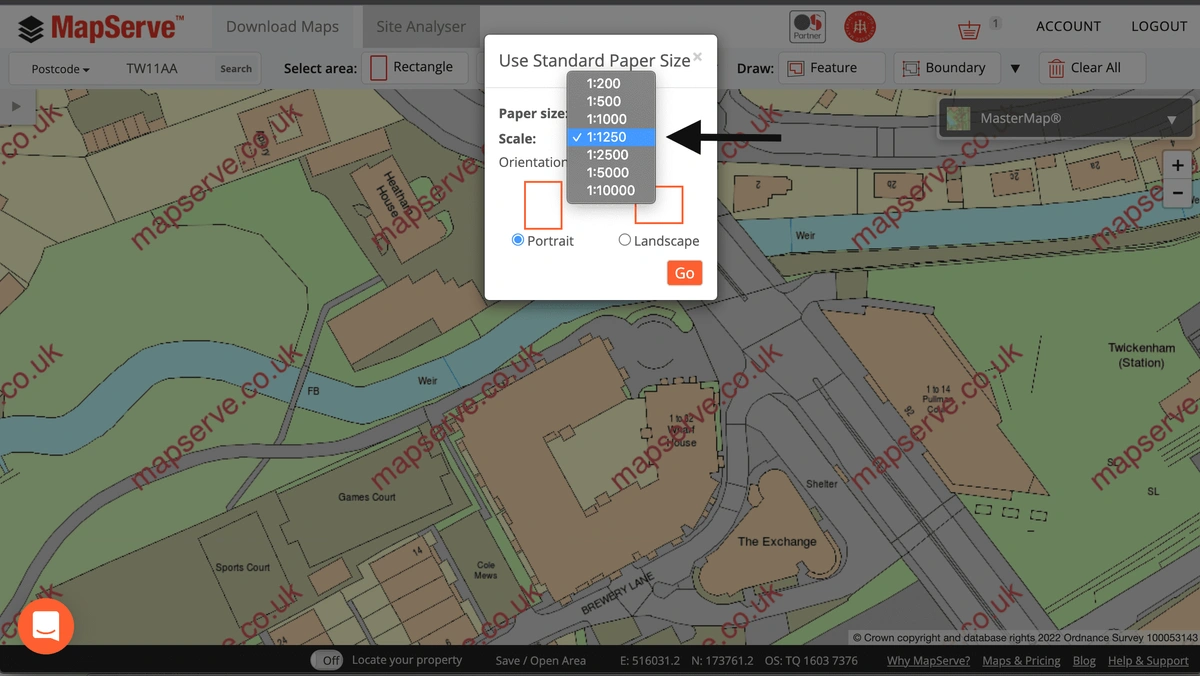
Step 4
The next step is to click on the 'Papersize' tool from the toolbar at the top of the map. A location plan is usually 1:125o or 1:2500 scale for larger areas. Click on the scale that you prefer and the orientation of your paper.
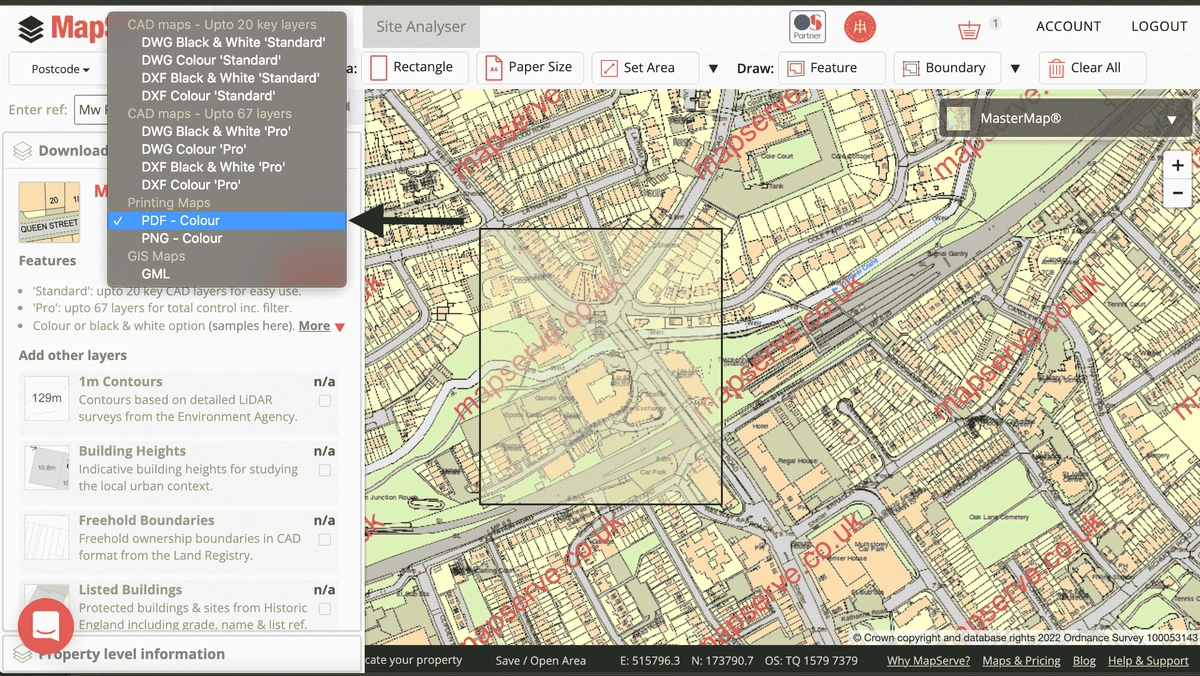
Step 5
Your map area will be selected. If you have chosen any boundaries or outlined a property or part of your property it will be shown within the green area. A location plan is usually ordered in PDF format. If you want a different format such as PNG or CAD (you will need CAD software in order to open and view DWG & DXF files) you can do so by clicking in the box under OS MasterMap®.
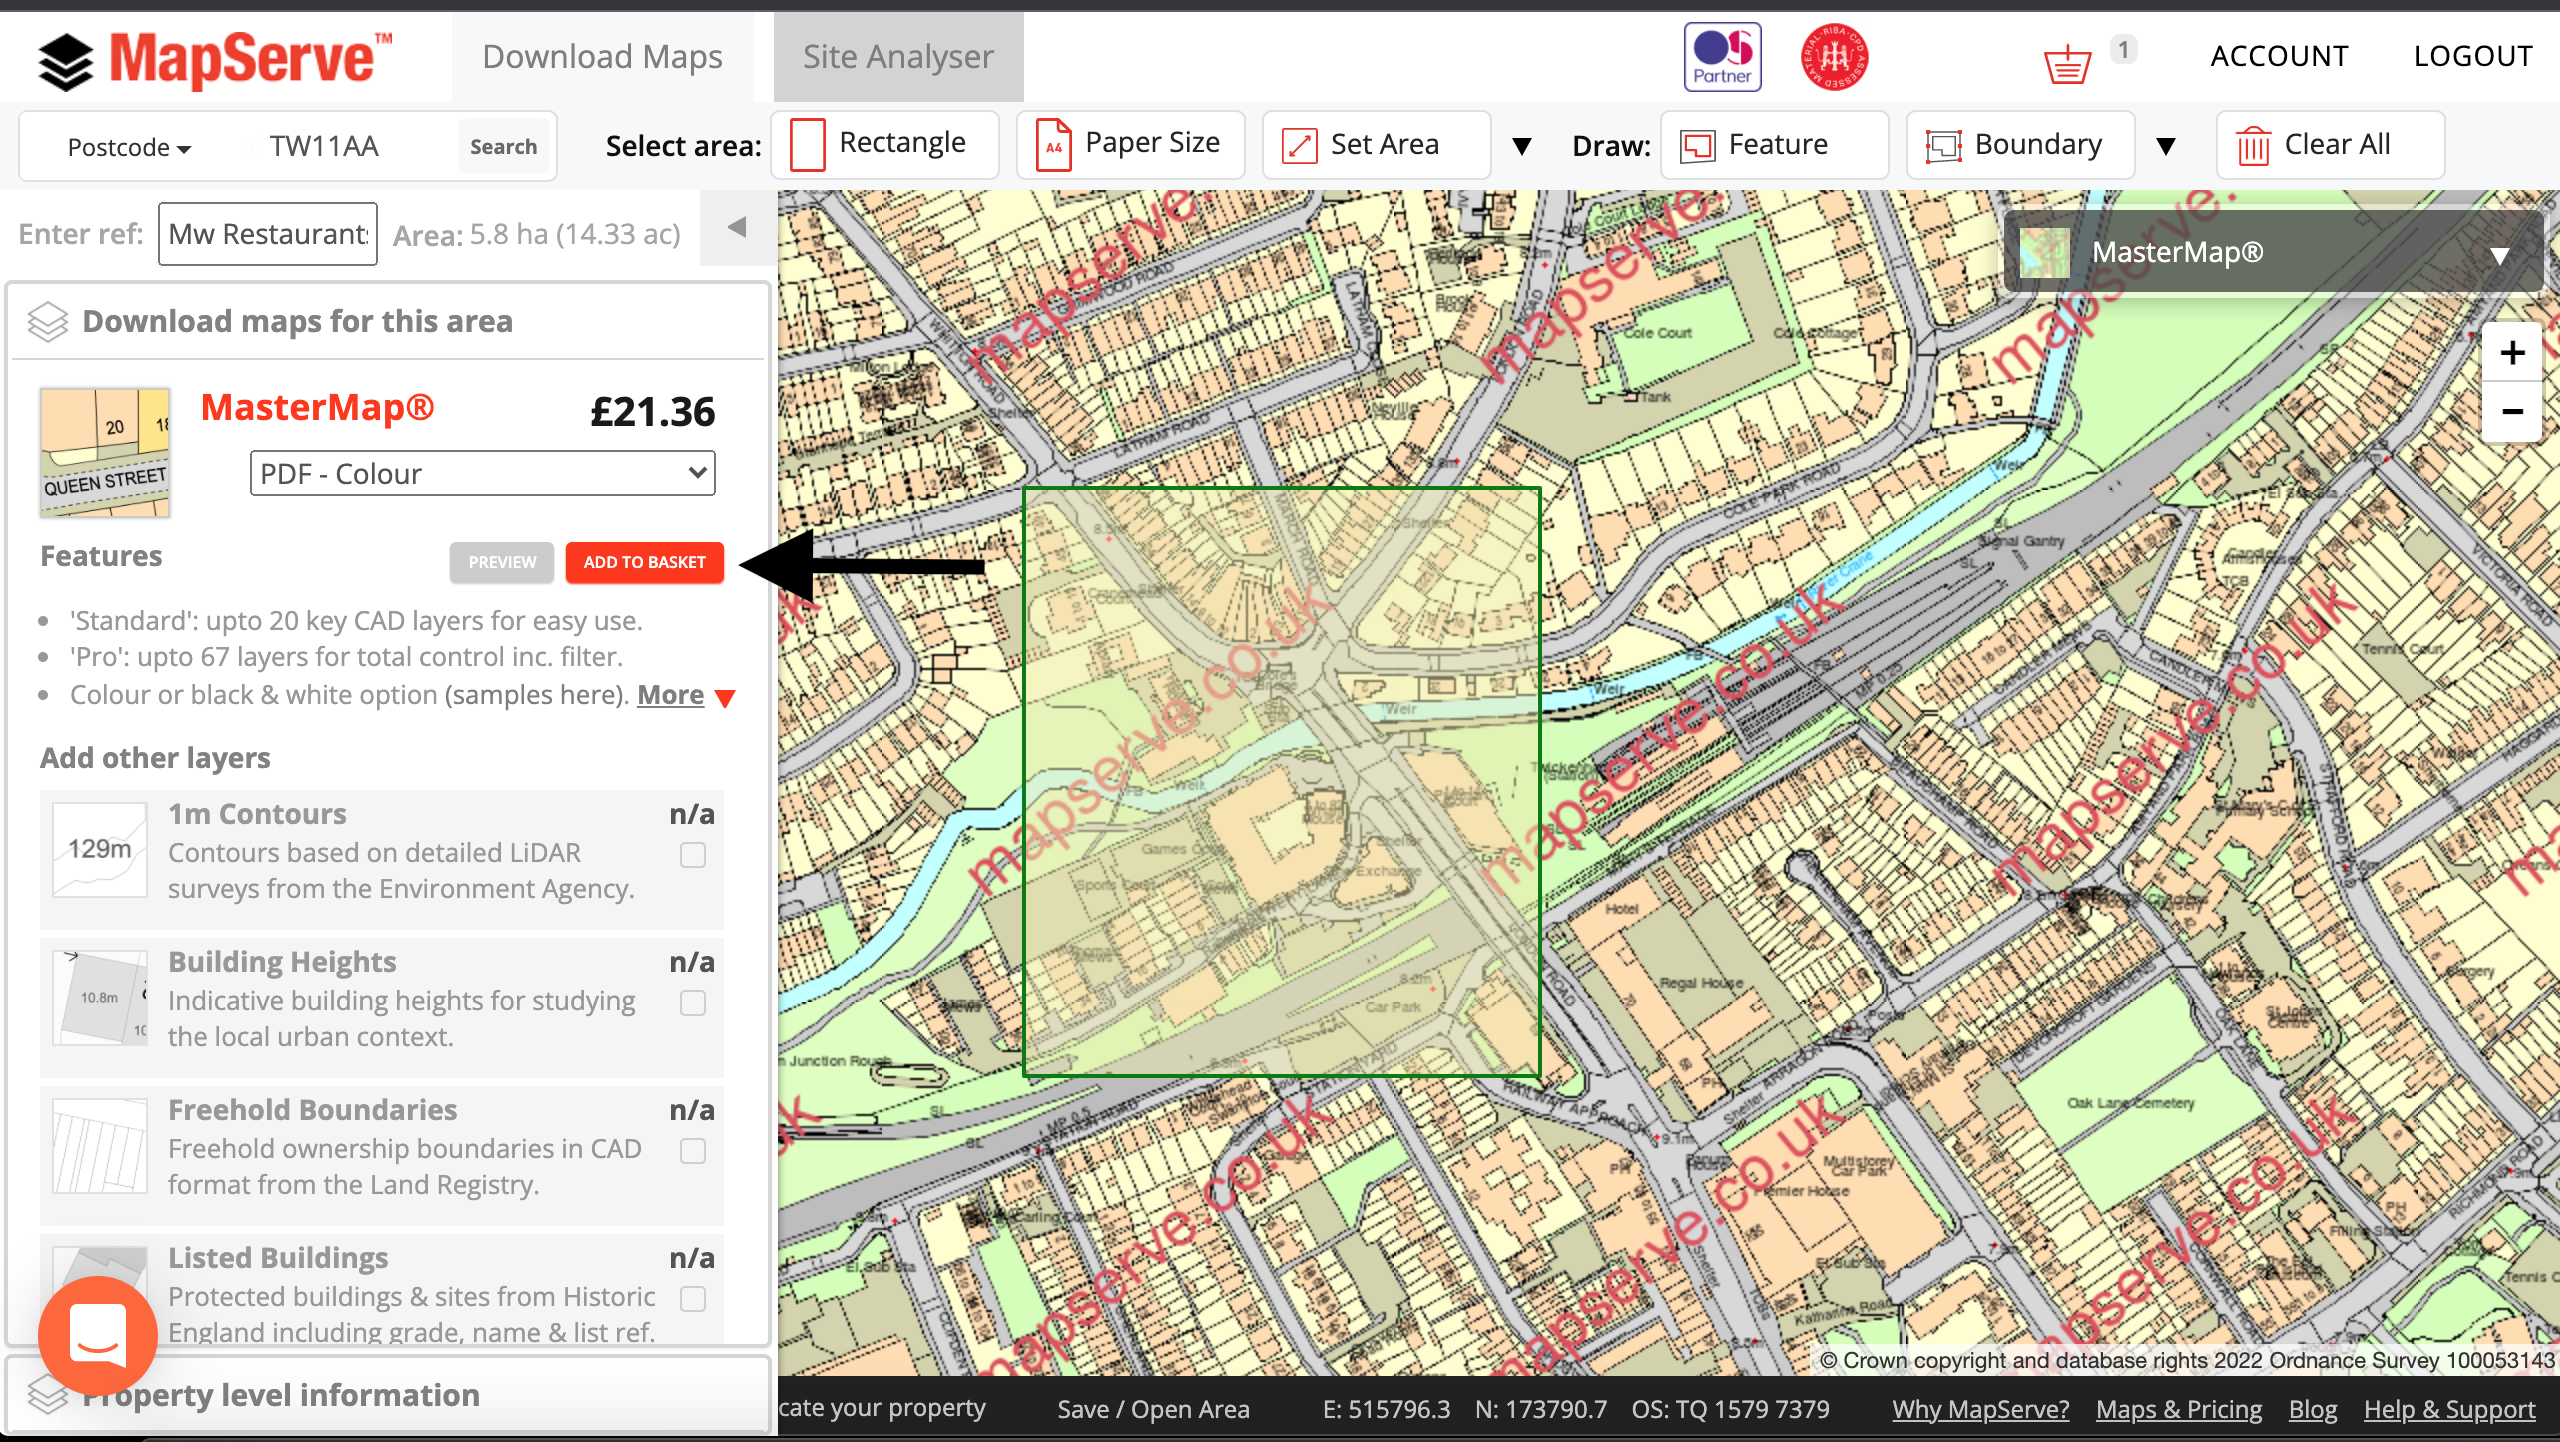
Step 6
Your plan's quote will be available to view on the drop-down menu on the left. If you are happy with the preview of your map and you are sure that you have selected and outlined the correct area, click on the orange button that says 'add to basket' right under MasterMap®.
Step 7
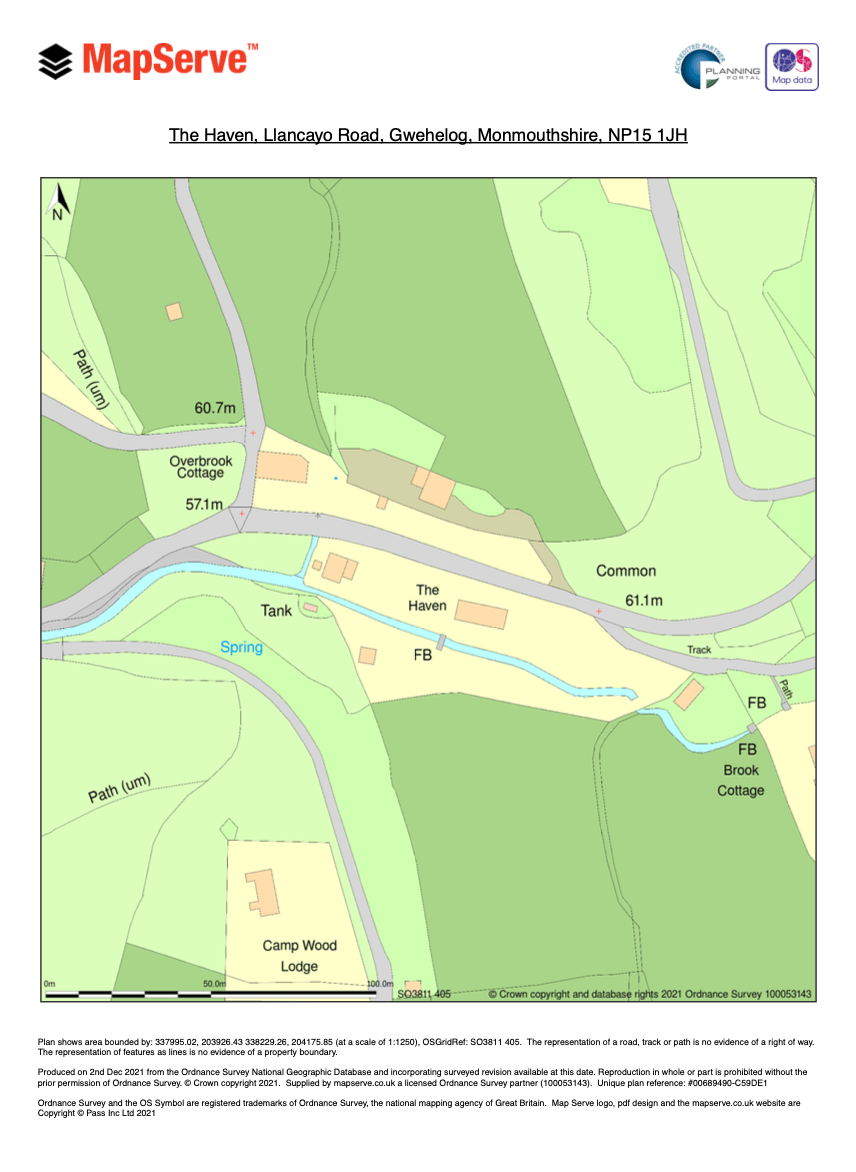
Your map is now added to your basket so you simply need to follow the steps and purchase your map. Your location plan will be available to download within seconds. The following is a sample of a location plan provided by MapServe®.